Introduction
Game development is all about achieving the perfect balance between visual excellence and optimal performance. When it comes to 2D games in Unity, rendering efficiency plays a critical role. Enter the “Sprite Slice Master” plugin, a powerful tool that simplifies sprite slicing to improve game performance.
Slice for Efficiency
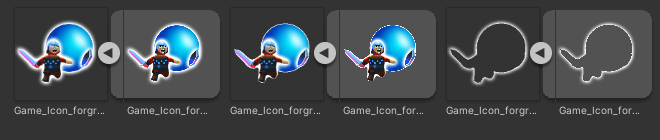
At its core, the Sprite Slice Master plugin offers a straightforward yet transformative capability: slicing sprites into opaque and transparent parts. This seemingly simple process has far-reaching implications for your game’s performance.
Opaque as Clipping Masks
One of the key benefits of the plugin is that it separates the opaque and transparent parts of a sprite. The opaque portion acts as a clipping mask, serving as a window through which the underlying game elements are rendered. This approach minimizes overdraw, where multiple pixels are drawn only to be covered by subsequent layers. With the opaque part acting as a mask, Unity can optimize rendering by rendering only what’s visible.
Efficient Material Usage
Another advantage of Sprite Slice Master is its efficiency in material usage. It streamlines your game by enabling you to use just two materials for your sprites:
- SpriteOpaque: This material is applied to the opaque part of the sprite, acting as a clipping mask. It’s essentially a window to the world behind it.
- Sprite Default (from Unity): The transparent part of the sprite uses Unity’s default material. This ensures efficient rendering of transparent elements while maintaining visual integrity.
Optimized Game Performance
By splitting your sprites into opaque and transparent parts and optimizing material usage, Sprite Slice Master significantly improves game performance. Here’s how it benefits your project:
- Reduced Overdraw: With the opaque part acting as a clipping mask, you’ll experience less overdraw, resulting in faster rendering and improved frame rates.
- Efficient Material Handling: By limiting materials to just two, you simplify asset management, reduce draw calls, and enhance overall rendering efficiency.
How to Use?
Step 1: Import Your Sprite
- Add the script from the zip file to your project Scripts or any folder.
- To open Sprite Slice Master go to Tools/ND Toolbox/Optimization/Sprite Slice Master.
- In the Sprite Slice Master window, click on “Input Sprite” or Drag and drop your Sprite into the Sprite field.
- Select the sprite you want to slice from your project’s assets.
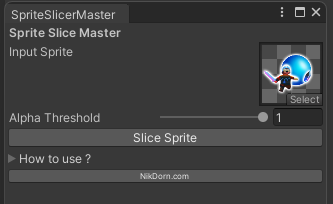
Step 3: Set the Alpha Threshold
- Adjust the “Alpha Threshold” slider to determine the transparency threshold for the slice. This controls what is considered opaque and what is transparent in your sprite.

Step 4: Slice the Sprite
- Once you’ve set your threshold, click the “Slice Sprite” button.
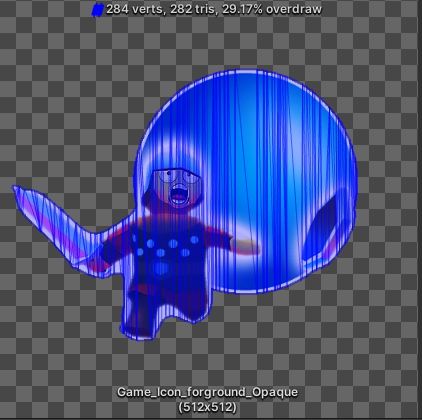
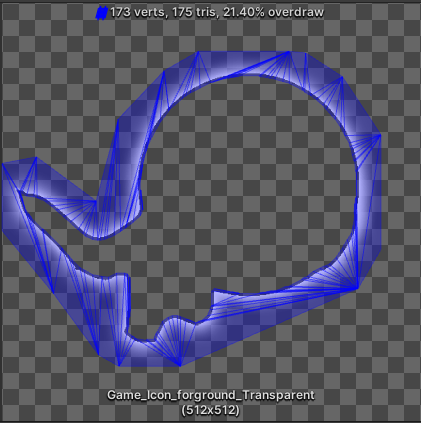
- The plugin will create two new textures within the same sprite, one for opaque parts and another for transparent parts. They will be named with “_Opaque” and “_Transparent” suffixes.
Step 5: Customize the Outline (Optional)
- If you wish to add a custom outline to the opaque part of the sprite, follow these steps:
- Select the “_Opaque” sprite you just created in your project.
- Open the Sprite Editor (usually by clicking the “Sprite Editor” button in the inspector).
- In the Sprite Editor’s “Custom Outline” tab, adjust the “Outline Tolerance” to 1.
- Click “Apply” to save your changes.
Step 6: Save Your Changes
- Your sliced sprite is now ready to use in your Unity project. Be sure to save your project to keep the changes.
That’s it! You’ve successfully sliced your sprite using the Sprite Slice Master plugin and can now use the sliced sprites in your Unity project as needed.
⚠️This tool is now part of the ND Toolbox!
You can find it and many other powerful tools in the ND Toolbox, a comprehensive Unity package designed to streamline your workflow.
👉 Check out the ND Toolbox here!
Comments are closed.